Moving to a new blog . . .

Posted in Uncategorized on January 9, 2009 by Kim

Goodbye to gray cat sewing .  .  . for now at least . . .

I found myself wanting to do more non-sewing related posts so I started a new blog.  There will still be plenty of sewing, but I hope to post about some of the other things I do like hiking, making mozzarella cheese, and my other way-too-numerous interests.

I’m now posting at girlwithatimemachine.wordpress.com so come over and visit me there 🙂

Mother necessity . . .

Posted in crafts, household sewing with tags on October 6, 2008 by Kim

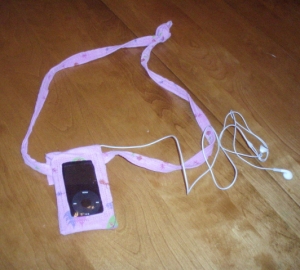
Every time I see an ipod “purse” at a store I pick it up, look at the pricetag, and then put it down, saying to myself “I could make that”.  I’ve been doing this since I got an ipod, and finally I’ve made my tote.  This is my prototype, so it isn’t perfect, but more than adequate for the job.  The strap is a little long, hence the knot.  I didn’t think of adding a compartment for the earbuds, so I have to stuff them in with the ipod, or fold them up and stick them under the flap.  Best of all–this tote was  FREE! I didn’t purchase anything for this project. 

 I traced my ipod for the pattern, added a tiny bit of ease (I think 1/4 inch to each side) , seam allowances, made the front piece with length added for a flap (with a big facing), and a rectangular hole for the  window.  I added a seam allowance to the hole and folded the seam allowance back and attached the window (a piece of clear vinyl from packaging of some sort). Oh, i almost forgot to mention that I had to clip the corners of the seam allowance on the hole of the front piece before I could fold it back. I hope that make sense–I think it will if you try to make one.   I used the triple straight stitch for all seams and top stitching and my fabric is scraps of corduroy left over from a jumper I made for my girl.   I do recommend a sturdy fabric.  The front flap is attached to the back with velcro. 

My next version may have a longer flap, with a pocket in the flap for the earphones.   Or, I may do an armband version, which would be handier for jogging. 

These are what my pattern pieces looked like–it’s really a very basic and straightforward project.  If you click on the picture, you’ll be able to better see my pattern pieces and it will give you a better idea how I drafted them. 

 I’ve used my ipod tote nearly every day since I made it–I should have made one months and months ago. 

I’d like to make one for my mobile phone too, as I like to use the ear piece and would prefer being truly hands free. 

Frustration . . .

Posted in Uncategorized on September 24, 2008 by Kim

Well, I was going to write some posts tonight, but I cannot get an image to insert into my post tonight.  I have an Amy Butler handbag to post about as well as an ipod tote/carrier/whachamadoodle, self-drafted pattern.   The handbag is another gift, but the ipod tote is for me (and I love it; it’s so handy).  Both were made entirely from stashed or scrap materials. 

Next on my to-sew list:  a jumper and a skirt for my daughter from some cute printed corduroy that I dyed “plum blossom” (my ipod tote is made from scraps of the same fabric).  I’ve planned a complete fall/winter r to sew for my girl; I hope to accomplish a good deal of it.   And I have tons of sewing planned for myself:  the jumper from the latest Ottobre Woman,  a blouse from knipmode, a blouse from a BWOF from last year, knit dresses, tops, a cape, jackets, pants . . .   I also want to sew some pjs and pants for the boys.  I don’t know when I’ll find the time for all this sewing, and Halloween costumes too, but I like to dream big.

My sister’s birthday present, pt 2

Posted in Uncategorized on September 15, 2008 by Kim


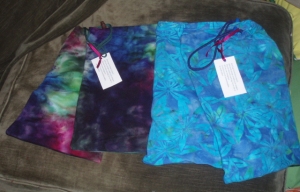
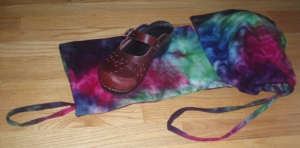
The apron wasn’t the only thing I made for my little sister–I also made her a couple pair of shoe bags.  Shoe bags are very simple to make and I think a nice gift for any adult person who ever travels and doesn’t want clean clothes and street shoes to come into contact.  I used flannel from a local quilt shop–1/2 yard per pair of shoe bags.  If I were making shoe bags for a man, I’d probably make them a bit longer–maybe using 5/8 ” fabric.   It’s handy to have a shoe handy to help gauge the length and width needed.   I ripped on the cross wise grain at each end of the half yard piece and then on the lengthwise grain halfway across to make two equal sized rectangles.  The tie die bags are slightly shorter because I also ripped crosswise strips to make two drawstrings (which I didn’t use for her bags but I did use for some bags I made for my own shoes:

One bag has a shoe in it. 

I folded each rectangular piece in half and sewed up the long edge opposite the fold and one end.  I finished the seams with a serger, pressed the seams, then folded over a casing at the open edge (folding the raw edge in as well).  At one end of each casing, I unfolded the casing and sewed the folded over raw edge for about an inch (not catching it into the bag).  This was my opening for the drawstring.  I folded the casing back in and stitched around, except for the drawstring opening. 

For my sister’s drawstring, I took a synthetic drawstring type trim I’d bought and cut it to the right length.  I used a match to melt the ends so they wouldn’t fray, and then used a safety pin to insert the drawstrings into the casings.  I tied the ends into a knot and turned the drawstring so that the knot was inside the casing.  I then inserted the looped drawstring into the cord lock by looping a piece of thread around the drawstring and threading the cord lock with the thread, then pulling the drawstring through.   The drawstrings for my shoe bags were sewn and turned fabric tubes, inserted and knotted the same way, but I did not attach cord locks. 

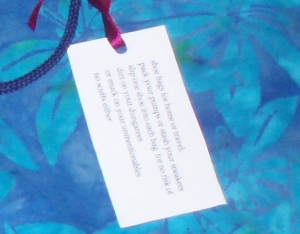
For the gift bags, I attached cards:

A little faint, but I think still readable.  I love to attach little tags to things I make for gifts.

Little helpers . . .

Posted in pincusion on September 7, 2008 by Kim

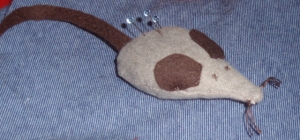
For a few days I was into making mouse pincushions: maybe because I was reading my kids the currently out-of-print Miss Bianca by Margery Sharp (which is a sequel to The Rescuers, and thus the main characters are mice).  

 It’s a very simple pattern:  a teardrop shaped body (top and bottom identical), mouse ear shaped ears, and a mouse-tail shaped tail.  Sew ears on to one of the teardrops, at an appropriate place a little back from the point (nose), baste tail to one of the round ends of a  tear drop (tail pointing in), embroider eyes with floss (mine are twinkling star shaped eyes, just because), sew tear drops together right sides facing, leaving a hole for stuffing, turn mouse right side up. 

As for the proper stuffing for a pincushion:  sawdust, emery powder, fine sand are all nice.  I had none of these so I tried a bit of pencil shavings in the nose and stuffed the rest with wool stuffing (hair and wool are supposed to be good because, along with the other stuffings mentioned, they are supposed to help keep your pins and needles sharp).  Pencil shavings weren’t as ideal a choice of stuffing as I’d hoped:  I couldn’t manage to stuff the mice without getting graphite dust on the outside of the pincushions.  It isn’t noticible on the brown mouse, but it is on the white with polka dots mouse.  The polka dot mouse was supposed to be a gift, but she was too dirty to give away so I gave away my other brown mouse instead. 

After sewing, I whipstitched the opening.  I sewed little floss whiskers on the brown mice;  Here’s a better look:

My sister’s birthday present, pt 1

Posted in Uncategorized on September 7, 2008 by Kim

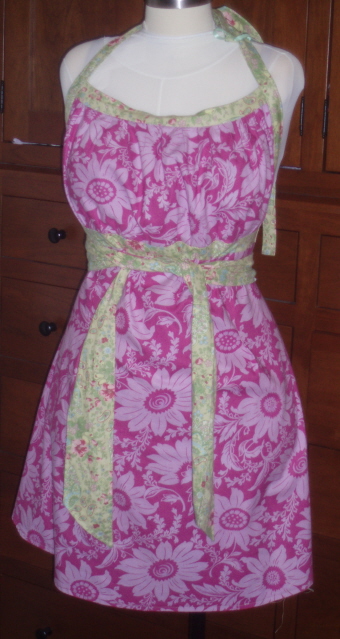
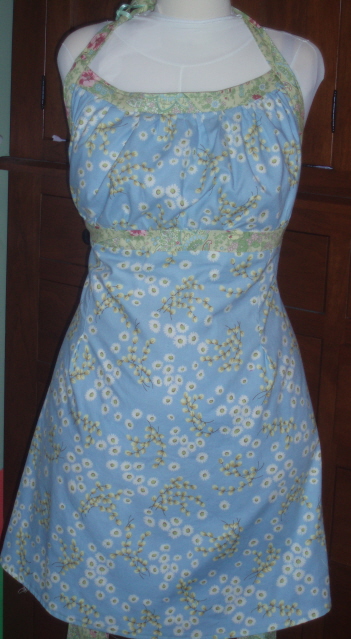
My sister’s birthday is past, and my present is late, but, hey, that just makes the festivities continue.  I made her the Emmaline Apron— a cute, reversible apron.  It’s one-size-fits-all, but I added length and width to the bodice pieces to make a sort of a full-bust-alteration.   I added to the trim pieces too, and that will work for her as she has broader shoulders than me, but for a more narrow shouldered person, I’d just gather the extra width into the existing top band.  I hope she likes it: the last apron I made her had large red hippos on it, so this one is a definate improvement in fabric choice.  I’m glad to be using these Amy Butler fabrics that I’ve had in my stash for several years.

No t-shirt for me after all . . .

Posted in Uncategorized on August 25, 2008 by Kim

The That Girl t-shirts were sold out, so my order was cancelled.  Oh well . . .

On the bright side, I’ve watched disc 1 of season 4 and hopefully disc 2 is on the way.

I’ve only done the tiniest bit of sewing–I made some mouse pincushions.  I have some gifts to make, but I’ve had a little virus and have felt too icky to sew bigger projects.  I’m better today, but I had pressing work and now I’m too tired to see, let alone sew.   I’m off to bed, good-night!

Speaking of That Girl

Posted in blouse, off-topic, That Girl on August 19, 2008 by Kim
I found this shirt at amazon.com.   It will be a great hiking/camping shirt. For me, that is:  I can’t envision Ann camping or hiking, I have to say.  Would her hair have that fabulous flip after 3 days in the woods?  Would she put on her eyelashes?  What would she wear?  I also saw at amazon, that Season 4 has just been released on DVD–yay!  It’s now in my Neflix queue . . .  One of the episodes in season 4 is called “Ugh, Wilderness” so perhaps I will find out how Ann makes out in the woods . . .
Also, today I wore my wavy stripe blouse (see my previous post) and got two compliments about how slim and trim I looked.  So I will be wearing that blouse every week from now on.  If only I could wear it every day! 

Groovy, baby . . .

Posted in blouse, Burda WOF with tags on August 16, 2008 by Kim

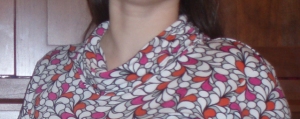
I just finished this blouse and am in love with it. . . The vertical wavy lines are very slimming.   The buttons don’t exactly match (they are black and cream and the blouse has black, two shades of gray, and white) but they are vintage 60’s from Sawyer Brook and they are called “Ann Marie”, which is the name of Marlo Thomas’ character on That Girl.   I am such a fan of That Girl and have watched the first three seasons on DVD from Netflix–and drooled over her wardrobe  . . .  But I digress . . . Anyway, here is the blouse:

And here you can better see the “Ann Marie” buttons:

This is the same pattern from the June 08 BWOF that I used for the flower power blouse and the bicycle dress.  I don’t think I’ll use it again this summer, but maybe next one.


Hmmmmm:

Posted in Burda WOF on August 10, 2008 by Kim

I can’t really tell you if this project is a success or not.  I’ll wear it, but I doubt I’ll make it again.   There are many other styles that are more flattering to my figure.  Here it is:

and here it is on me:

I did get this top to work for me as much as this style will ever work for me.  I will wear it and I love the cowl:

Here are the pleats at the front, although they are difficult to see with the print:

The top as pictured is shortened 10 inches from the pattern.  I originally shortened it 7 inches which put it below my hip area (unhemmed) and that would have been a nice length if I had thin enough legs to wear skinny jeans.  But, I’m a hippy pear so I decided a shorter length would be more flattering on me. 

Now for my issues:  This top had way too much ease in it, at least for my taste.  I looked 20 pounds heavier than I am, and the sleeves were too low, the bust area was so wide that when I raised my arms I had mini batwings under my arms.   The model in the magazine is wearing a vest over her tunic so it’s hard to tell how much ease there is, and she has on a wide belt which also hides the ease.  When I basted the side seams I found out that this top has a ton of ease–way too much.  Part of this may be my fabric, which is a stretchy rayon lycra jersey.  I should have been suspicious when I tissue-fit the pattern and the sleeve fit around my bicep: I almost always have to make a wide bicep adjustment.  I decided to sew the sleeve in flat, instead of setting them in, which made fitting easier.  I had to take in from the bottom of the sleeves all the way to the hip .  The hip ease is good, at least for my ample hips).  It took me about 5 bastings to get a decent fit, taking out 4-6 inches of ease.    There is still plenty of ease for the pleats to drape, but it fits better in the sleeves/armpit/bust area and there is at least a hint that I have a waist. 

As I said before, I won’t be making this again, but if I did, I’d start with a smaller size and ease out to my regular size at the hips.  And I should have made a muslin. . .  But I will wear this top with some straight legged black jeans and try to figure out what to wear until the loose tunic fashion is over and done with.